|
There are many settings in both CDendro and CooRecorder which are saved when you close these programs.
When you upgrade to a new version of CDendro & CooRecorder you probably want to take your old settings with you.
With modern versions of the programs this usually works automatically because different versions of CDendro share the same parameter file.
Likewise with CooRecorder. When you want to transfer setup data from one PC to another you have to copy the parameter file from one PC and over into the other, see below. |
Here is how to copy the setup parameters from one old CDendro version to a new version running on the same PC.

|
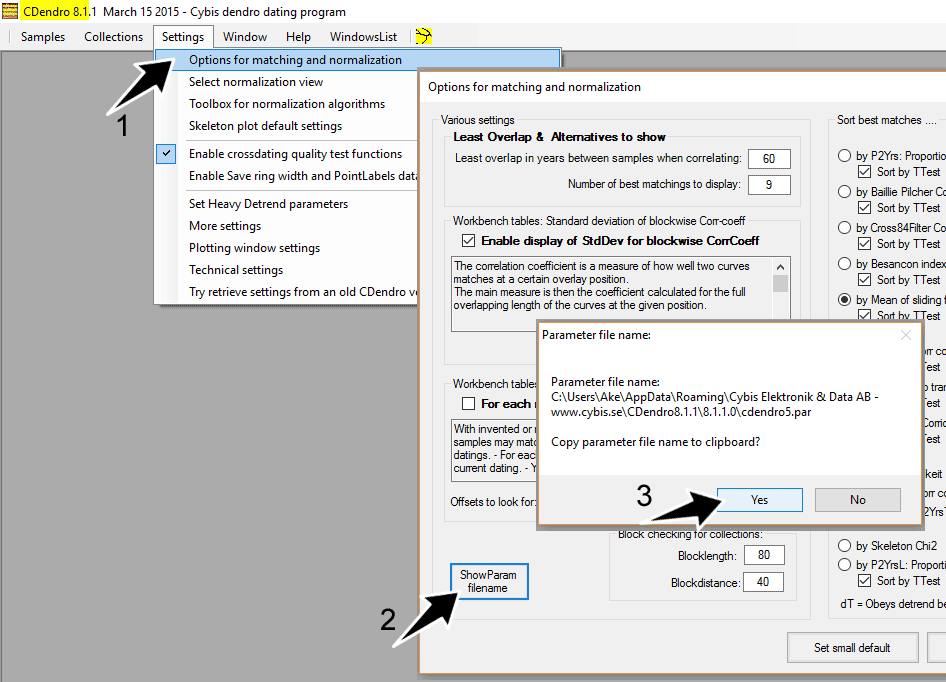
In your old CDendro version e.g. 8.1 open the menu command Settings/Options for matching and normalization. In the lower left
corner, press the button "Show param file name". You will now be given the option to save that file name on the Windows clipboard.
Click Yes. - Then close this old version of CDendro.
The name of the old parameter file is now stored on the clipboard. |
Reading the old parameter file into the new version of CDendro on the same PC
(When the automatic updating does not seem to work.)
|
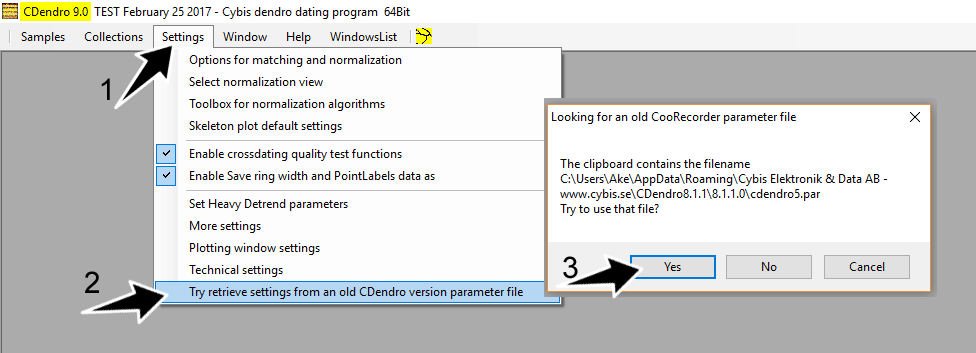
Start your new version of CDendro and open the menu command Settings/Try retrieve settings from an old CDendro version parameter file.
CDendro will now find the name of your old parameter file on the clipboard, open the file and retrieve all your old settings.
That's all! Please follow about the same procedure to transfer old settings from an old CooRecorder version into a new one:
Note: If you need to upgrade from a very old version of CDendro/CooRecorder, you have to follow about the same procedure, but the program will only show you the actual file name. You have to write it down. When you then want to retrieve the data from within the new CDendro/CooR., you will have to search for the right filename in an open file dialogue box. |
How to copy CDendro/CooRecorder settings from a first PC to a second PC
How to install the USB memory stick with the parameter file into a second PC: |

If you do not succeed in making Windows File Explorer copy the parameter file to the USB memory stick, do this:
The name of the parameter file is now on the clipboard. |